Google Cloud Storage requires several steps to configure.
You will start at the API credentials manager:
https://console.developers.google.com/projectselector/apis/credentials
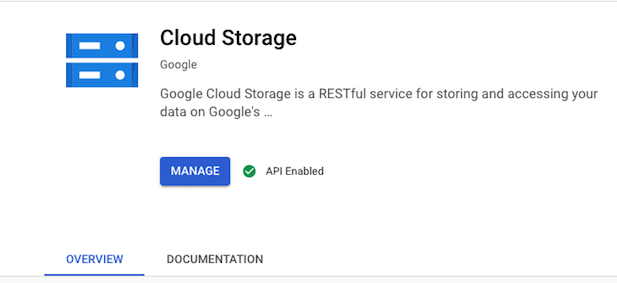
You need to enable the GoogleStorage API for your account if its not already.
https://console.developers.google.com/apis/library/storage-component.googleapis.com/
Create a new project. My example calls this "CrushFTP-Test".

1. Web Application type
#
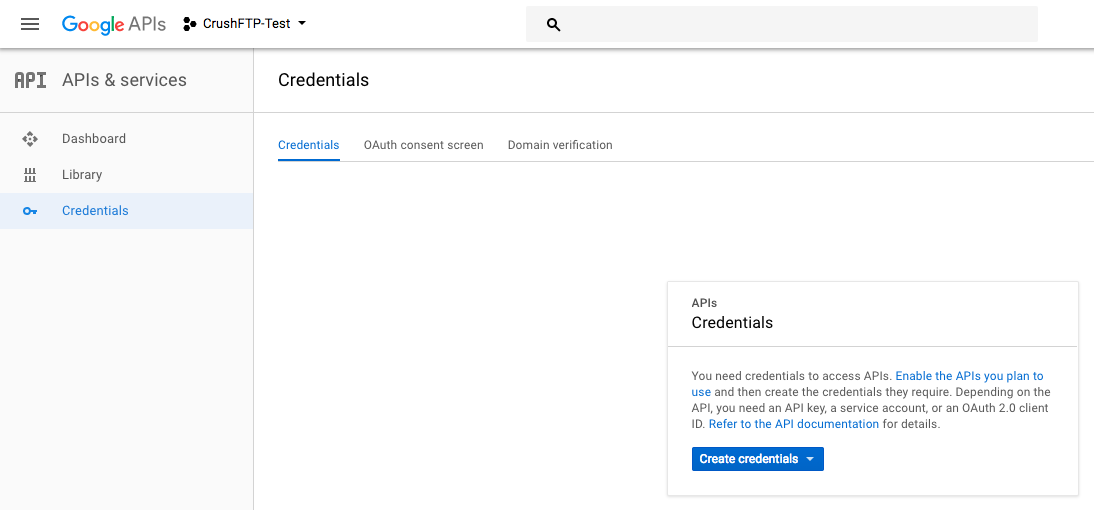
Next, click on the "Create Credentials" button, and choose the Web Application type.
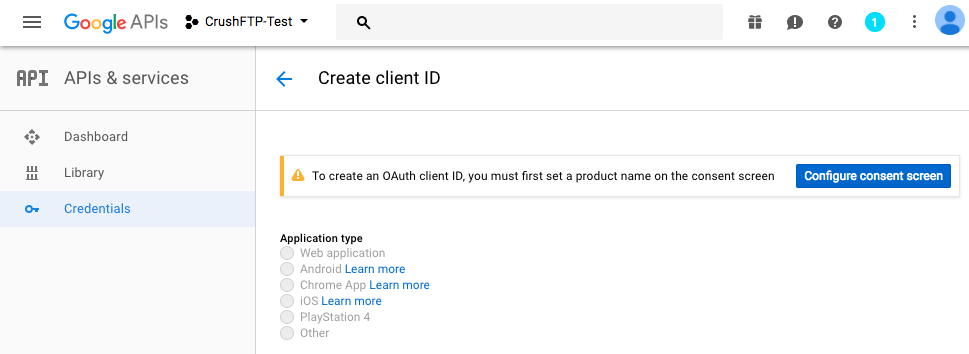
It will warn you if you don't have an "OAuth Consent" screen configured, so go there and configure that screen too.
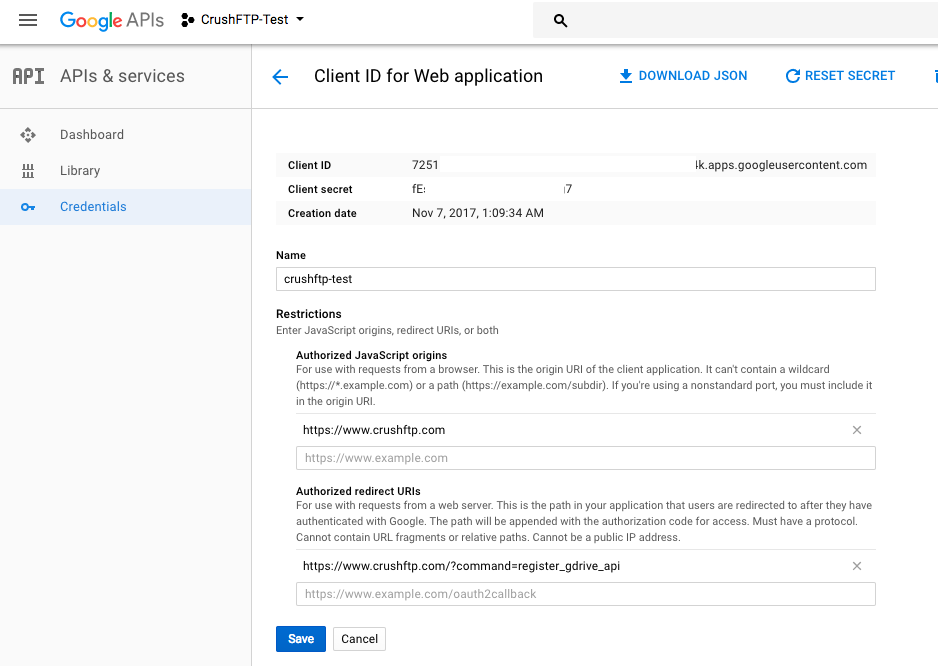
When configuring the credential, you have to tell Google the domain you will be originating from when creating the auth token, so this is the URL you use for server administration. Just the protocol://dns_or_ip:port Don't have a trailing slash or it will complain.
Configure the redirect URL of where Google will send you back after approval. This needs to follow the syntax in the example. Specifically, your domain needs to end with:
?command=register_gdrive_api
And one last important step, you need to enable the GoogleDrive API for your account if its not already.
https://console.developers.google.com/apis/library/storage-component.googleapis.com/


Now that the API is enabled, your credentials are setup, and your redirect domains are configured, you can use the credentials in CrushFTP to get your Google auth token and get access.
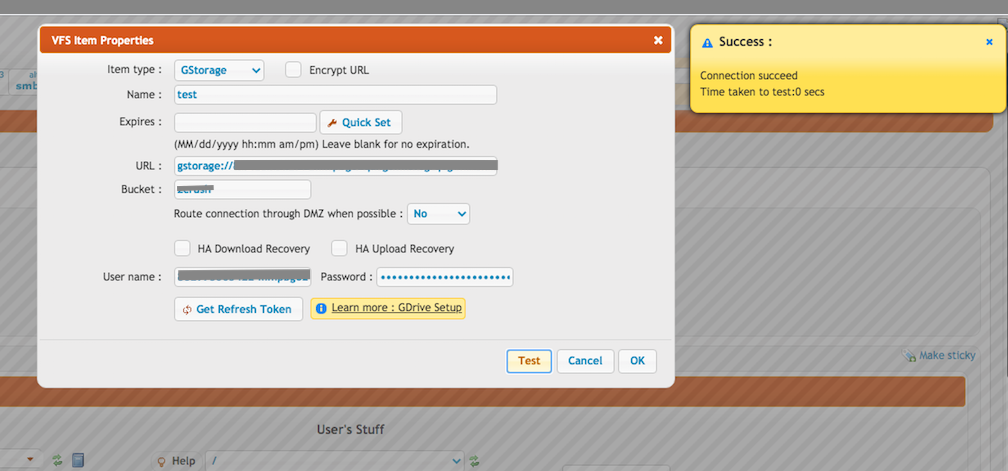
In the User Manager, add a new remote VFS item type and set the protocol to be "GStorage".
Click "Get Refresh Token" to finish the config. Provide the client id and secret.

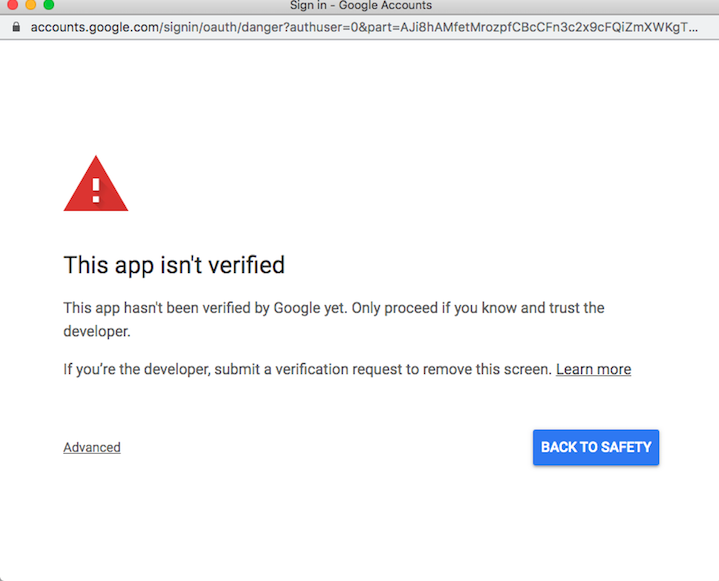
If your domain is not verified you will get a warning message, click on Advanced and proceed further:
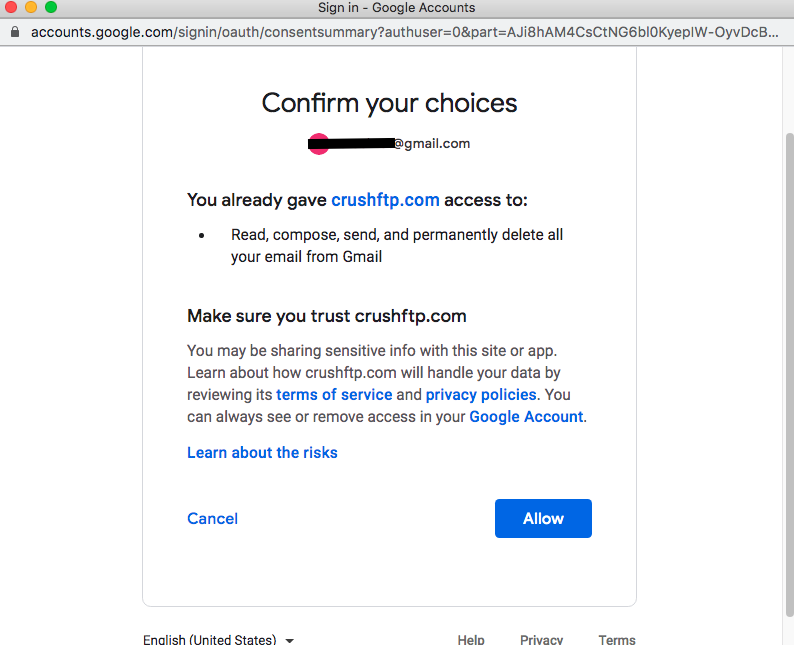
Click on allow:
The refresh token will be saved as password.
Provide the bucket and the path.
It is done! Test the connection and save it!
2. Service Account type
#
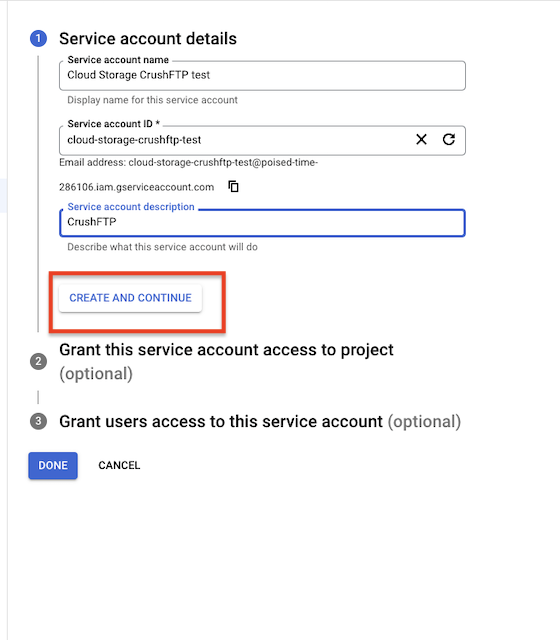
Create Credentials -> Service Account.
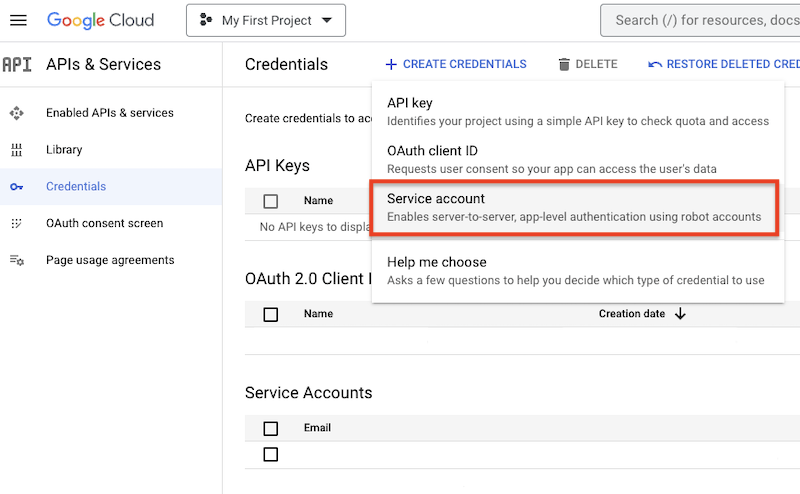
Provide a name and continue.
Configure the service account access.
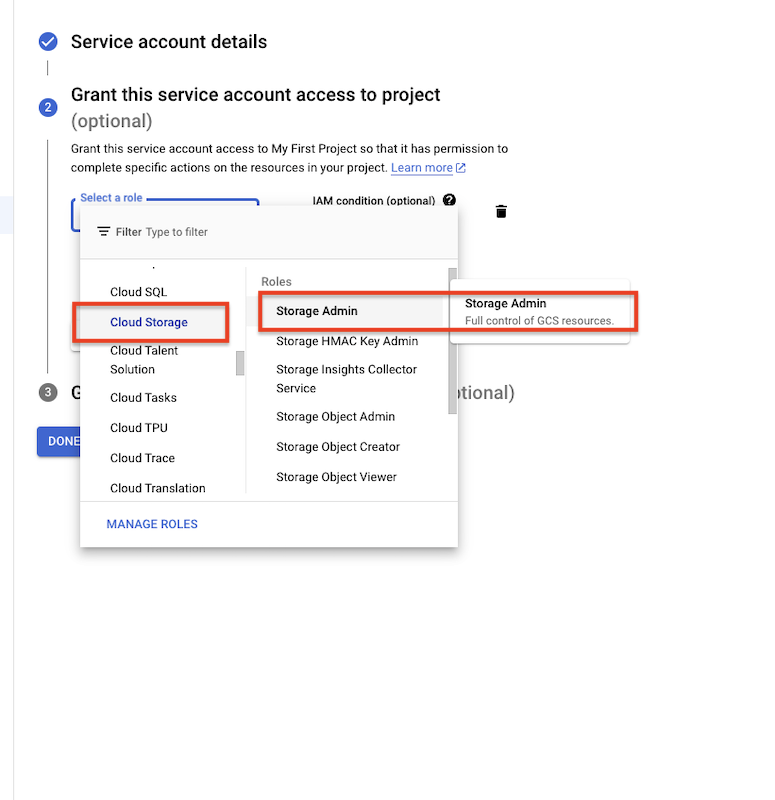
Click on the "Done" button.
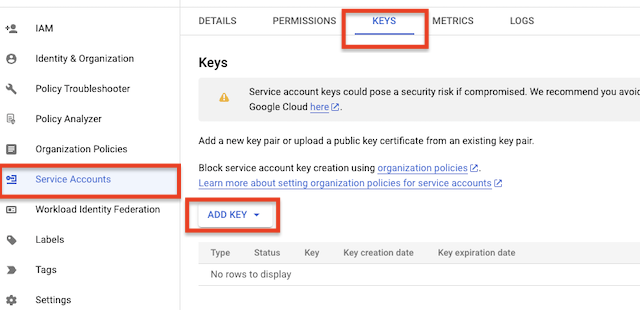
Navigate to the newly created Service Account. Go to the KEYS tab. Click on the "Add KEY" button.
Add new attachment
Only authorized users are allowed to upload new attachments.
List of attachments
| Kind | Attachment Name | Size | Version | Date Modified | Author | Change note |
|---|---|---|---|---|---|---|
png |
allow_form.png | 100.3 kB | 1 | 29-Dec-2020 05:25 | krivacsz | |
png |
bucket_and_test.png | 250.0 kB | 2 | 29-Dec-2020 05:25 | krivacsz | |
png |
clopud_storage_api_enable.png | 47.1 kB | 1 | 29-Dec-2020 05:25 | krivacsz | |
png |
cloud_storage_sttings.png | 63.4 kB | 1 | 10-Jul-2023 10:26 | krivacsz | |
png |
gstroage_s3_api_vfs_enabled.pn... | 174.9 kB | 1 | 12-Jul-2023 10:21 | krivacsz | |
png |
not_verified_domain.png | 111.6 kB | 1 | 29-Dec-2020 05:25 | krivacsz | |
png |
oauth_form.png | 61.3 kB | 1 | 29-Dec-2020 05:25 | krivacsz | |
png |
s3_vfs_settings.png | 210.0 kB | 1 | 10-Jul-2023 10:48 | krivacsz | |
png |
service_account.png | 113.5 kB | 1 | 10-Jul-2023 08:27 | krivacsz | |
png |
service_account_details.png | 83.7 kB | 1 | 10-Jul-2023 08:39 | krivacsz | |
png |
service_account_new_key.png | 72.9 kB | 1 | 10-Jul-2023 09:43 | krivacsz | |
png |
service_account_private_key.pn... | 41.0 kB | 1 | 10-Jul-2023 09:48 | krivacsz | |
png |
service_acount_vfs_test.png | 130.7 kB | 1 | 10-Jul-2023 10:02 | krivacsz | |
png |
storage_account_access.png | 121.4 kB | 1 | 10-Jul-2023 09:29 | krivacsz |
«
This particular version was published on 10-Jul-2023 09:47 by krivacsz.
G’day (anonymous guest)
Log in
JSPWiki