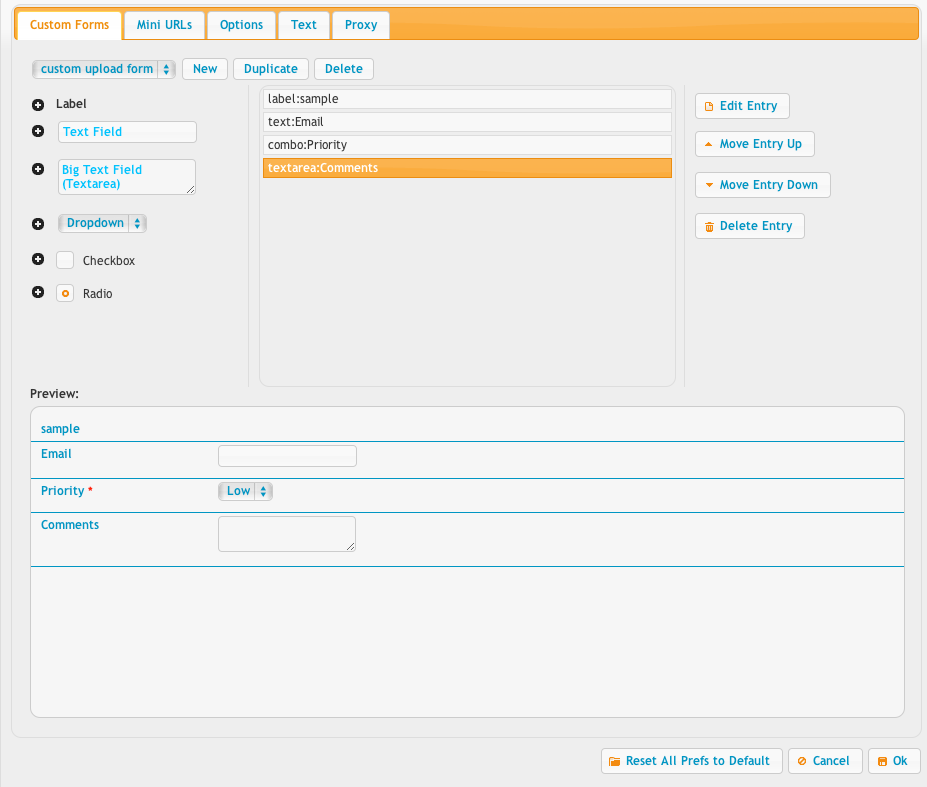
This allows you to customize some server wide settings about the WebInterface. This is where you create login message forms, and custom upload forms that can require users to send additional information with their file uploads.
A custom form can be created by clicking the "New" button. Then choose your form in the drop down menu. Click the plus signs on the left side to add new entries to the form, then fill in the information as you are prompted for it. Once an entry is created you can go back and edit it, or change its order in the list with the buttons on the right.

You can also do some advanced hiding and showing of elements based on selected entries.
So, let’s say you have a drop-down called “order_form_cascade” and then I create three options within that drop-down called, “poster”, “photo_prints”, and “generic”.


Then the following from elements have names like below:

item1_poster
item2_poster
item3_poster
item4_poster
Item5    <----is always shown since it has no matching tag on the end of it.
item6_photo_prints
item7_photo_prints
item8_generic
item9_generic
item10_generic
etc.

Its the end of the form element name that tags it to be hidden with the cascade functionality.  So if the name of other form elements ends with the name of the values of a form element that ends with "_cascade" then those other elements will be hidden until the selection is made referencing them.
See miniURL for info on miniURL configurations.
You can also do an auto login URL. In the example, the username is "demo" and the password is "demo". The path=/demo/ indicates to start the user in the /demo/ folder.
https://www.crushftp.com/?u=demo&p=demo&path=/demo/
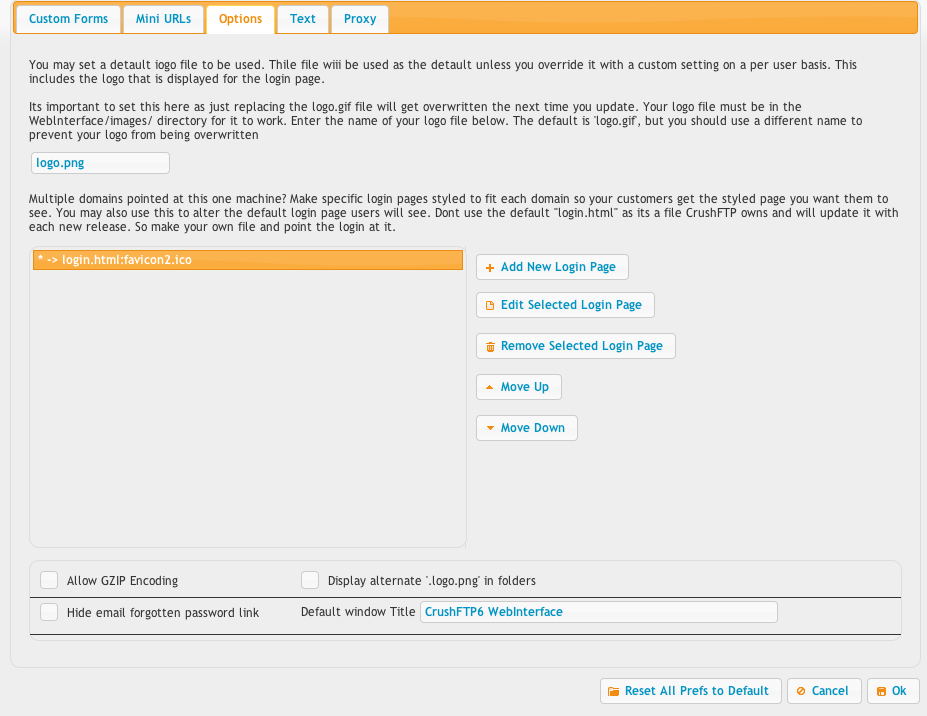
The options tab lets you set a global logo to be used for all login pages, and the HTML WebInterface. It also lets you specify rules for hosting multiple domains on a single server and having different custom login pages served each to its own domain that was used. There are a few other items as well such as GZIP which can cause issues with proxies and some older IE versions.

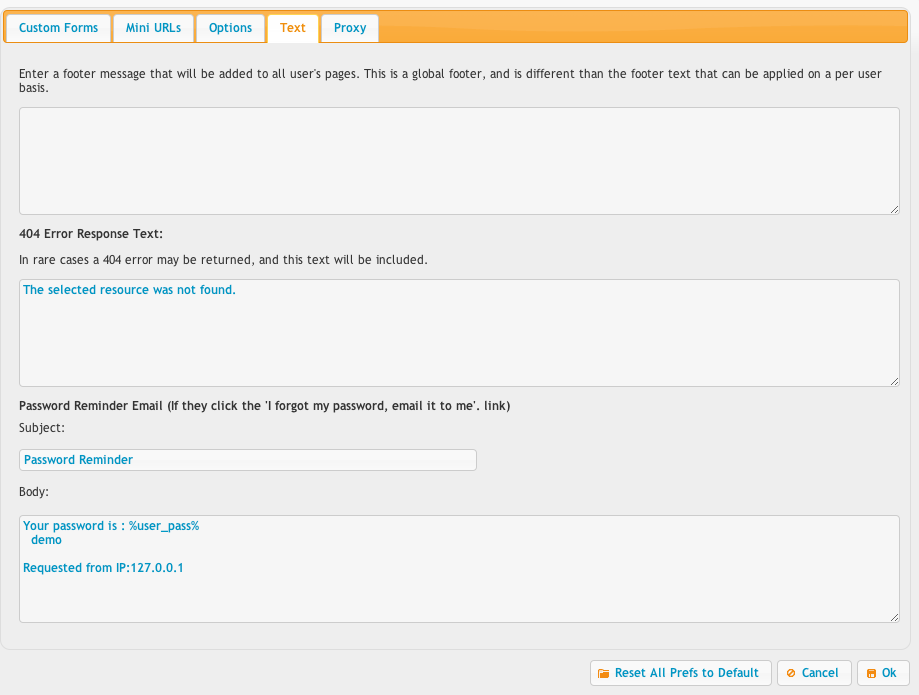
The text tab lets you customize some common error messages.

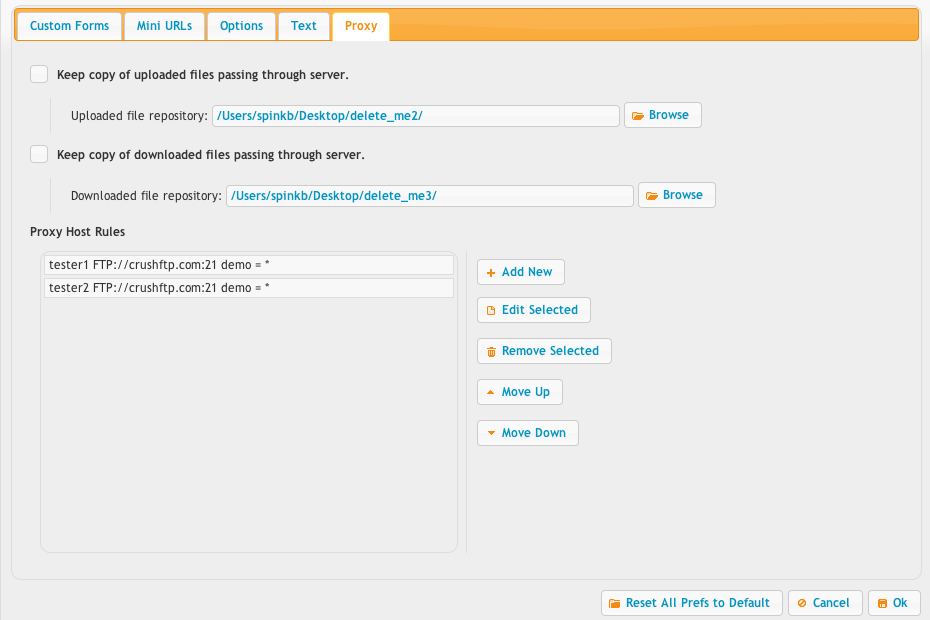
The proxy tab allows you to force CrushFTP to archive off files as they are transferred through CrushFTP when its acting as a proxy. This is useful when say CrushFTP is acting as a HTTP front end to a plain FTP server.

Add new attachment
List of attachments
| Kind | Attachment Name | Size | Version | Date Modified | Author | Change note |
|---|---|---|---|---|---|---|
png |
prefs_webinterface_form.png | 55.2 kB | 2 | 29-Dec-2020 05:25 | Ben Spink | |
png |
prefs_webinterface_miniurl.png | 56.6 kB | 2 | 29-Dec-2020 05:25 | Ben Spink | |
png |
prefs_webinterface_options.png | 76.7 kB | 2 | 29-Dec-2020 05:25 | Ben Spink | |
png |
prefs_webinterface_proxy.png | 53.1 kB | 2 | 29-Dec-2020 05:25 | Ben Spink | |
png |
prefs_webinterface_text.png | 46.7 kB | 2 | 29-Dec-2020 05:25 | Ben Spink |