Enable self registered accounts and send a link to set their password on first login.
#
CrushFTP supports allowing users to self register on your server. This is not automatic, and you must configure and personalize this experience. You have extensive controls over the entire process. You can also have the users get an email to set their password and a folder created for the users with the same domain to access their common files.
The first step is to create a username in the user manager that will be used for this. Keep it simple, and use a basic simple password too. Do not assign them any additional privileges as this will be a public account that is used for doing registrations.
I suggest an account name "register" with a password of "register". This will allow you to use a URL like this to reach the registration page:
https://www.crushftp.com/?u=register&p=register&path=/WebInterface/jQuery/messageForm.html
When this page loads, it looks at the URL to see the name of the HTML file. The default is "messageForm" and its fine to keep it this way. It then asks the server to give it the registration form named "messageForm" as long as it has been assigned to the "register" user. If it hasn't, you will just get a blank page. If you do not use this custom login.html link, the registration can still be processed, its just a little less intuitive to the user that it was processed.
The next step is to make a form named "messageForm" in the Preferences, WebInterface, Custom Forms. There are only two required items for this form, the username and email. Every field item must have a 'name' that starts with 'registration_'.
So for the two required items, they would be label:"Email" and it's name:"registration_username" and label:"Confirm Email" with the name:"registration_email". You can have more items, just look at a user.xml file to see other element names. So if you wanted to include another item in the registration, you would do 'registration_otherelementname'.
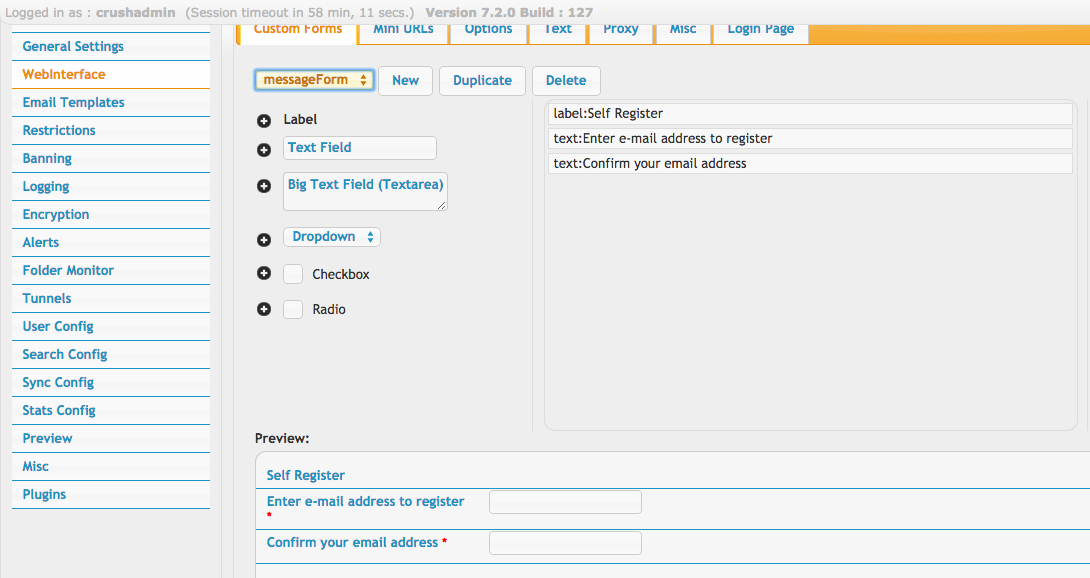
Now that you have the form defined, and the registration user created, you need to assign this form to the registration user. You do this in the User Manager. Use the Quick Jump drop down to get to the WebInterface section. Then assign your form there.

Save all changes, and you are ready to test. When you login as the registration username, and go to that specific HTML page, this form will be loaded and sent in a 'registration' request mode.
http://www.domain.com:8080/?u=register&p=register&path=/WebInterface/jQuery/messageForm.html
This is what the form looks like for the user:

When a user self registers, their account is created as a disabled user, and added to a specific group called "pendingSelfRegistration". This group will contain all users that signup in this way. You can then review users in the group, enable their accounts, and remove them from the group. Or you may simply delete the user if they are not approved.
If you need further customizations, you can customize the messageForm.html page with your own copy and use it instead. Just be sure to use the appropriately named form name based on the html file's name. "messageForm.html" = "messageForm" from name.
To auto enable accounts and send user a link to set their password for first time user, configure an event. Update the path according to the machine that is hosting CrushFTP.
The path should be something like:
FILE://Applications/CrushFTP7_OSX/users/MainUsers/{registration_username}/user.XML
Or
FILE://C:/Program Files/CrushFTP7_PC/users/MainUsers/{registration_username}/user.XML

Add a new write file task to disable the non existent password. This will make it invalid and not decrypt-able. Find/Replace tab use "</password>" for the Find Text and "DISABLED</password>" for Replace With.
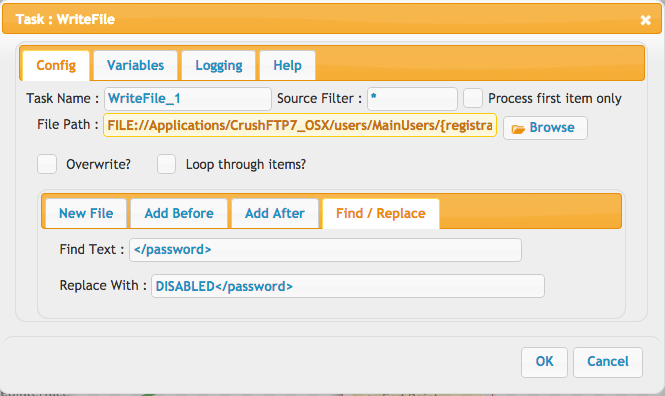
Other tabs are blanked out.
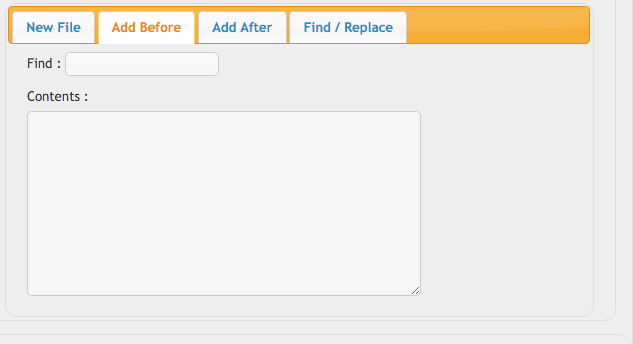
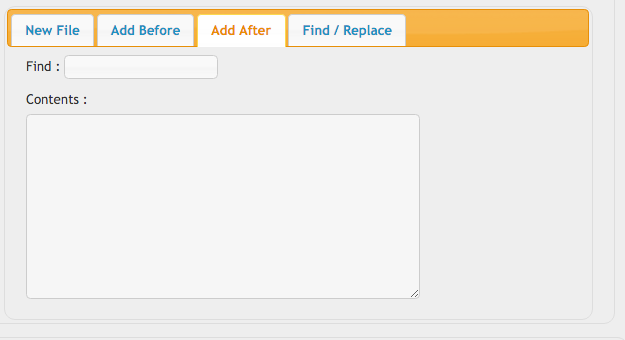
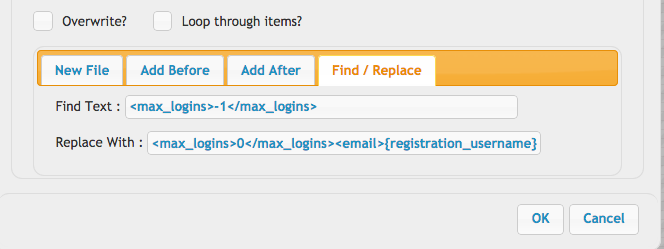
For another Write File task, we will do the same as before, but this time we are doing a Find/Replace to enable the account. In the Find/Replace tab use "<max_logins>-1</max_logins>" for Find Text and "<max_logins>0</max_logins><email>{registration_username}</email>" for Replace With. This sets their email to match the username and enables the account.
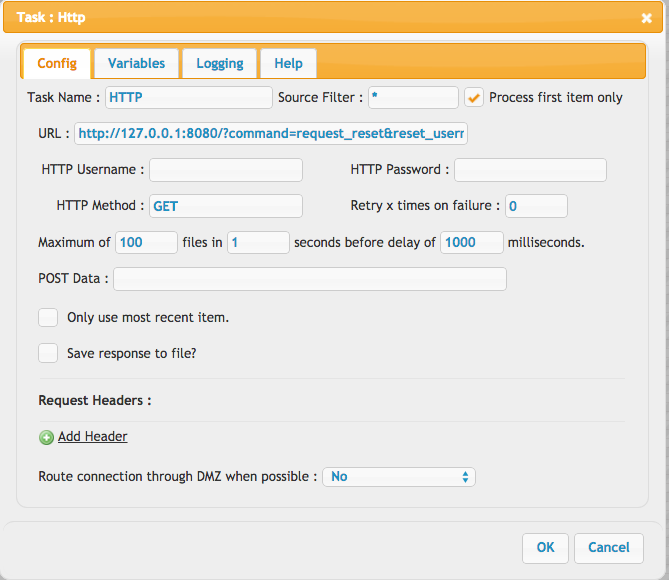
Finally we will make an HTTP call that will force the user password reset and will send the user an email with a link to reset their password. In the URL use:
http://127.0.0.1:8080/?command=request_reset&reset_username_email={registration_username}¤tURL=http://your_domain.com/WebInterface/jQuery/reset.html
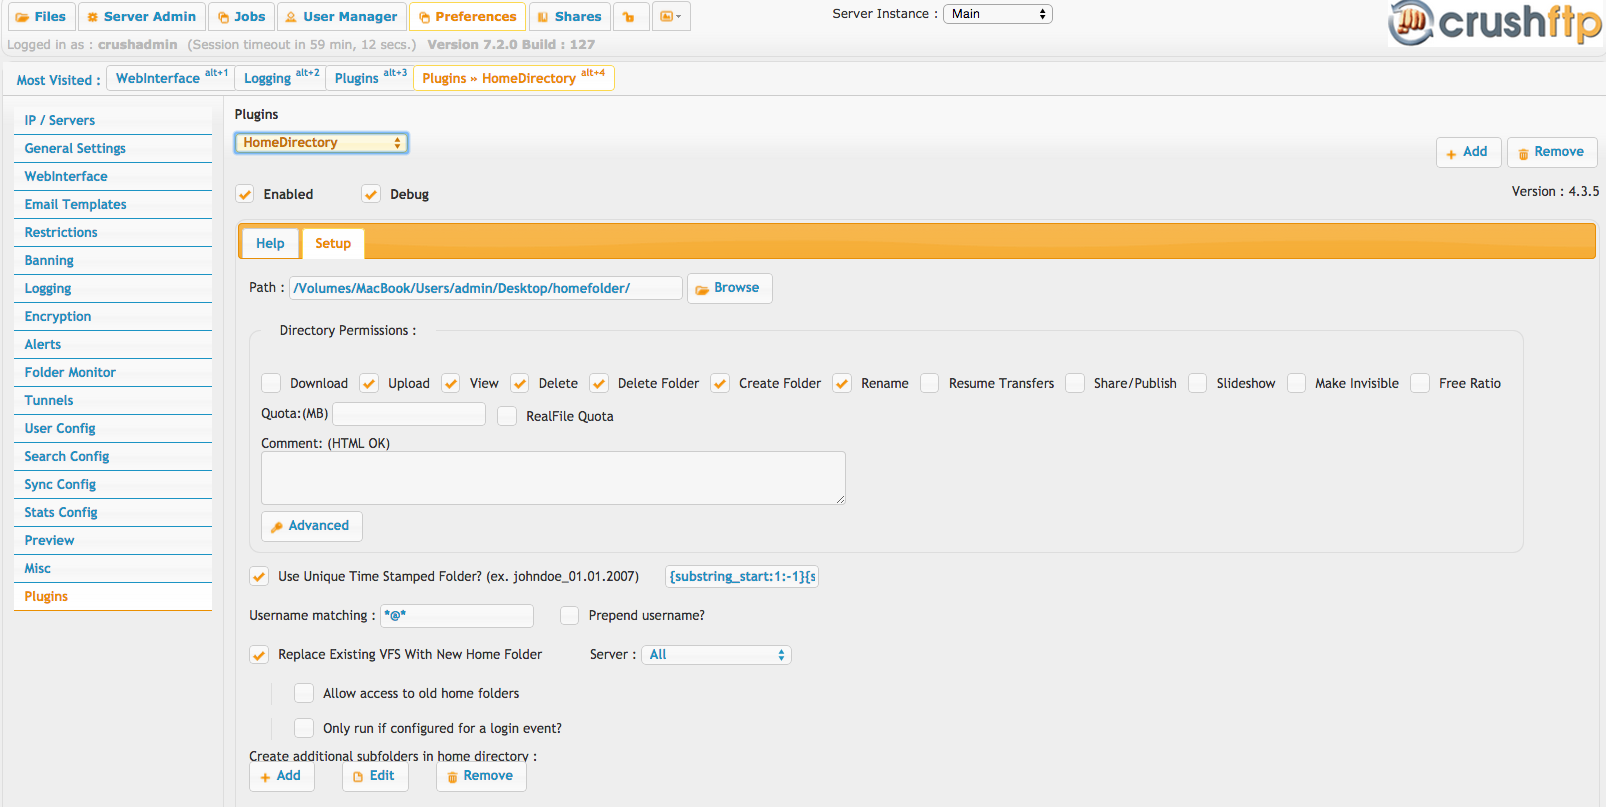
For the users with the same domain name to have a common folder you need to use the Admin>>Plugins>>HomeDirectory and set the Use Unique Time Stamped Folder? (ex. johndoe_01.01.2007) value to be this text manipulation string (it finds the @ sign, and keeps everything to the right of it.):
{split_start:@:1}{username}{split_end}
or for a complex one...
{substring_start:1:-1}{substring_start:{indexof_start:@:0}{username}{indexof_end}:-1}{username}{substring_end}{substring_end}
Go try things out now. Its finished.
Add new attachment
List of attachments
| Kind | Attachment Name | Size | Version | Date Modified | Author | Change note |
|---|---|---|---|---|---|---|
png |
Accepts disclaimer.png | 77.6 kB | 1 | 25-Oct-2018 04:31 | Halmágyi Árpád | |
png |
HomeDirectory.png | 228.1 kB | 1 | 25-Oct-2018 04:31 | Halmágyi Árpád | |
png |
Http_call_password_reset.png | 76.0 kB | 1 | 25-Oct-2018 04:31 | Halmágyi Árpád | |
png |
disabled password.png | 64.6 kB | 1 | 25-Oct-2018 04:31 | Halmágyi Árpád | |
png |
event.png | 113.4 kB | 1 | 25-Oct-2018 04:31 | Halmágyi Árpád | |
png |
message form enable.png | 23.0 kB | 1 | 25-Oct-2018 04:31 | Halmágyi Árpád | |
png |
register popup.png | 14.8 kB | 1 | 25-Oct-2018 04:31 | Halmágyi Árpád | |
png |
selfregister auto enable4.png | 33.7 kB | 1 | 25-Oct-2018 04:31 | Halmágyi Árpád | |
png |
signupform.png | 110.0 kB | 1 | 25-Oct-2018 04:31 | Halmágyi Árpád |
